Here's a quick tutorial on how to use my forest scripts (AF = AutoForest). As I've used these in the North, they're built around vegetation and terrain types found there, but once you figure them out, it's very easy to customize them to fit any area or climate.
Note: This tutorial assumes you already
a) have Macros/Keybinds mod installed,
b) know how to use it and
c) are able to locate your macros folder.
Step 1: Preparing the area
Fill any underground air pockets, and turn everything (except air) into North TerrainSet (2029:3). Most importantly, make sure there's no hidden green wool anywhere.
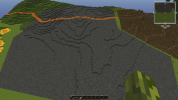
Step 2:
Paint the area you want to AutoForest with GREEN WOOL. In this example I've used VoxelSniper Overlay brush (/b over d1) to paint the area, but you can use WE brushes or selections if you're more comfortable with those. To make the following scripts work properly, it's important there's green wool only on the topmost layer, directly under air. So, if you're using WE, make sure to use //gmask <0.
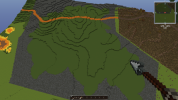
Step 3:
Make a selection around the green wool, with a 15-20 blocks buffer around it, and expand the selection 25 blocks up and down. This is important, since many of the schematics we'll use in the following steps have weird offset values and thus need a selection larger than actual work area to work properly. I recommend using //sel poly instead on regular cuboid selection, as it gives you more organic shapes.
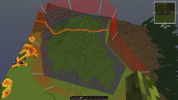
Step 4:
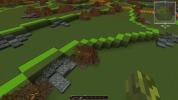
Run the first script, AF_01_Base. This script will add small bushes and piles of pebbles to smoothen the edges where the terrain steps up a block. Also, the script will line the edges with green and lime concrete to prevent the next steps adding trees too close to the edges.
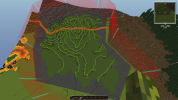
Step 5: Adding schematics
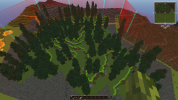
Now it's time to start adding trees. In this example we'll be using coniferous trees, starting with AF_02_NewEvergreenM. After running the script, we'll have a bunch of randomly scattered trees, with "circles" of brown wool under them.
Keep adding more trees by running
AF_02_ThinRedwoodM
AF_02_Pine
AF_02_SentinelS
AF_02_SentinelDead
AF_02_Conifer_Saplings
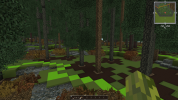
Note: You can add other types of trees etc. manually with schembrush at this point. Currently there's no script to automatically add the brown wool under them, but I'll write one soon.
Step 6: Details and textures
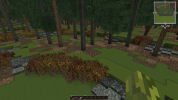
The next step is to start texturing the forest floor and adding details. First, run AF_03_Undertree_Spread. This script adds some more randomness to the forest floor and replaces some of the placeholders with final blocks.
After this, run
AF_04_Bushes
AF_04_Rocks_North
AF_04_Stumps
to add randomly generated details.
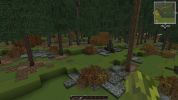
Note: As above, you can add further details with schembrush if you want to make your forest extra pretty. There are some forest detailing schemsets available, see https://westeroscraft.com/wiki/guides/schem-sets, at the bottom of the page.
Step 7: All done!
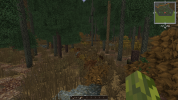
The final step: AF_05_Finish_Low will replace the rest of the placeholders and add tall grasses.
Customizing the scripts for other areas
If you want to use these scripts on other parts of Westeros, you can just change the terrain set, pebble layer and other "rocky" blocks (in AF_01_Base and AF_04_Rocks_North) into more suitable ones.
Other forest types
In addition to the conifer trees used in the example above, there are some other tree types already available, and more will be added eventually.
AF_02_Alder
AF_02_BirchL
AF_02_BirchM
AF_02_Maple
Note: This tutorial assumes you already
a) have Macros/Keybinds mod installed,
b) know how to use it and
c) are able to locate your macros folder.
Step 1: Preparing the area
Fill any underground air pockets, and turn everything (except air) into North TerrainSet (2029:3). Most importantly, make sure there's no hidden green wool anywhere.

Step 2:
Paint the area you want to AutoForest with GREEN WOOL. In this example I've used VoxelSniper Overlay brush (/b over d1) to paint the area, but you can use WE brushes or selections if you're more comfortable with those. To make the following scripts work properly, it's important there's green wool only on the topmost layer, directly under air. So, if you're using WE, make sure to use //gmask <0.

Step 3:
Make a selection around the green wool, with a 15-20 blocks buffer around it, and expand the selection 25 blocks up and down. This is important, since many of the schematics we'll use in the following steps have weird offset values and thus need a selection larger than actual work area to work properly. I recommend using //sel poly instead on regular cuboid selection, as it gives you more organic shapes.

Step 4:
Run the first script, AF_01_Base. This script will add small bushes and piles of pebbles to smoothen the edges where the terrain steps up a block. Also, the script will line the edges with green and lime concrete to prevent the next steps adding trees too close to the edges.


Step 5: Adding schematics
Now it's time to start adding trees. In this example we'll be using coniferous trees, starting with AF_02_NewEvergreenM. After running the script, we'll have a bunch of randomly scattered trees, with "circles" of brown wool under them.

Keep adding more trees by running
AF_02_ThinRedwoodM
AF_02_Pine
AF_02_SentinelS
AF_02_SentinelDead
AF_02_Conifer_Saplings

Note: You can add other types of trees etc. manually with schembrush at this point. Currently there's no script to automatically add the brown wool under them, but I'll write one soon.
Step 6: Details and textures
The next step is to start texturing the forest floor and adding details. First, run AF_03_Undertree_Spread. This script adds some more randomness to the forest floor and replaces some of the placeholders with final blocks.

After this, run
AF_04_Bushes
AF_04_Rocks_North
AF_04_Stumps
to add randomly generated details.

Note: As above, you can add further details with schembrush if you want to make your forest extra pretty. There are some forest detailing schemsets available, see https://westeroscraft.com/wiki/guides/schem-sets, at the bottom of the page.
Step 7: All done!
The final step: AF_05_Finish_Low will replace the rest of the placeholders and add tall grasses.

Customizing the scripts for other areas
If you want to use these scripts on other parts of Westeros, you can just change the terrain set, pebble layer and other "rocky" blocks (in AF_01_Base and AF_04_Rocks_North) into more suitable ones.
Other forest types
In addition to the conifer trees used in the example above, there are some other tree types already available, and more will be added eventually.
AF_02_Alder
AF_02_BirchL
AF_02_BirchM
AF_02_Maple


